If you’re diving into the world of Internet of Things (IoT) projects, the ESP8266 is an excellent choice for cost-effective and versatile experimentation. Indeed, ESP8266 IoT projects are popular due to their low cost, ease of use, and robust functionality. Therefore, in this blog post, I’ll guide you on how to make the most of these affordable boards, helping you create innovative IoT solutions.
He taught Adam the names of all things, then He presented them to the angels and said, “Tell Me the names of these, if what you say is true?”
Quran 2:31
Why Choose ESP8266 for IoT Projects?
The ESP8266 stands out among budget-friendly IoT boards. Available in models like ESP-01/01S, ESP-07/07S, and ESP-12E/12F/12S, these boards are very economical, typically costing between $1 and $2. Moreover, its built-in WiFi capabilities provide seamless connectivity for your IoT projects. Additionally, support for the Arduino IDE makes the development process easier, especially for beginners.
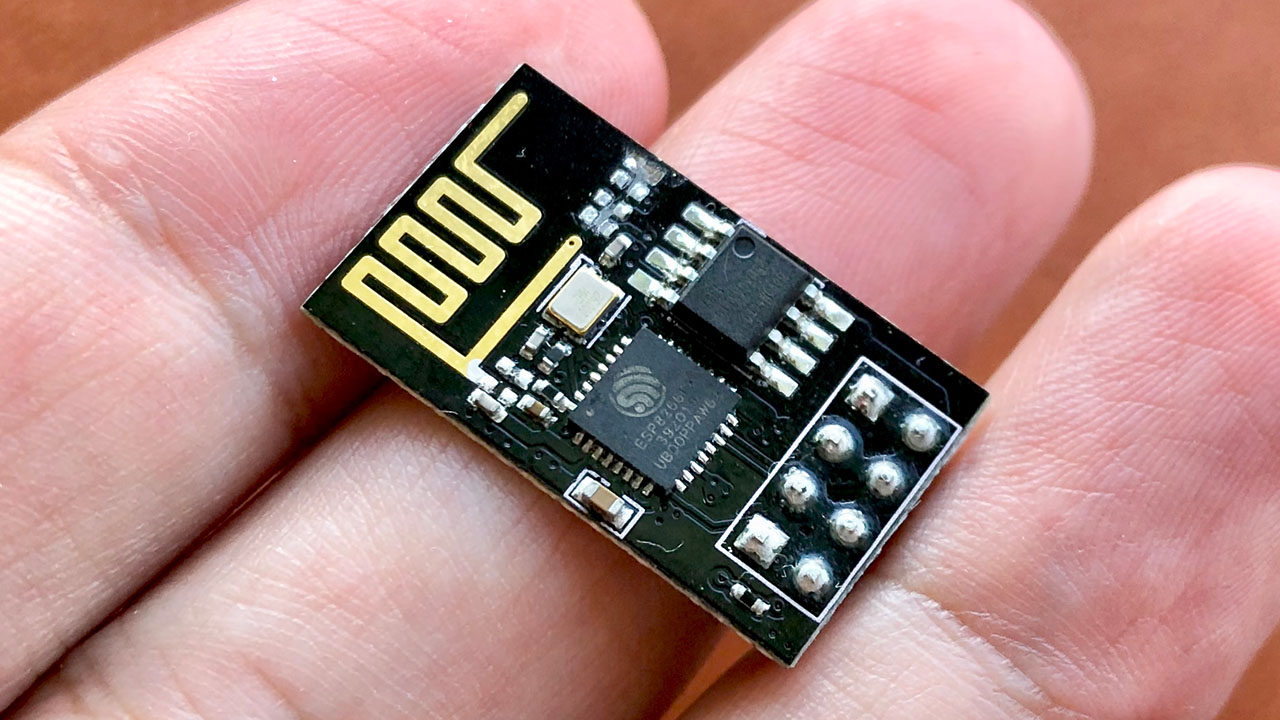
Getting Started with ESP8266
During my search on AliExpress, I found several affordable ESP8266 boards perfect for DIY projects. For my first hands-on experiment, I used an ESP-01 board powered by two AAA batteries. As a result, I created a simple WiFi door sensor using a magnetic reed switch. The reed switch controls the power to the ESP, so the board stays off while the door remains closed. When the door opens, the magnet moves away, activating the switch and powering the ESP-01.
Making A WiFi Door Sensor
After powering up, the ESP-01 board connects to a WiFi network and sends an HTTPS request to an IFTTT webhook. Consequently, this triggers a Pushover notification on my iPhone. Following this, the board enters deep sleep mode to save battery life.
Programming the ESP8266
#include <Arduino.h>
#include <WiFiManager.h>
#include <WiFiClientSecure.h>

const char* AP_SSID = "ESP8266";
const char* AP_PASS = "password";

const char* API_HOST = "maker.ifttt.com";
const int API_PORT = 443;
// Current fingerprint of the HTTPS server can be found by running the following command:
// openssl s_client -connect maker.ifttt.com:443 < /dev/null 2>/dev/null | openssl x509 -fingerprint -noout -in /dev/stdin
const char API_FINGERPRINT[] PROGMEM = "AA 75 CB 41 2E D5 F9 97 FF 5D A0 8B 7D AC 12 21 08 4B 00 8C";
const String API_URL = String("/trigger/front-door-opened/with/key/my-api-key");

ADC_MODE(ADC_VCC);

void setup() {

   // Measure battery voltage
   float vcc = ((float) ESP.getVcc()) / 1024;

   // Serial.begin(115200);
   // Serial.println("[1] ESP booted");

   WiFiManager wifiManager;

   // Uncomment the next line to clear all saved settings
   // wifiManager.resetSettings();

   // Set custom IP for portal
   wifiManager.setAPStaticIPConfig(IPAddress(10,0,1,1), IPAddress(10,0,1,1), IPAddress(255,255,255,0));

   // Auto connect with previously saved WiFi credentials, otherwise fallback to AP mode
   wifiManager.autoConnect(AP_SSID, AP_PASS);

   // Serial.print("[2] WiFi connected with IP: ");
   // Serial.println(WiFi.localIP());

   WiFiClientSecure client;
   client.setFingerprint(API_FINGERPRINT);
   if (!client.connect(API_HOST, API_PORT)) {
      // Serial.println("[3] API connection failed");
      return;
   }

   // Verify certificate
   // if (client.verify(API_FINGERPRINT, API_HOST)) {
   //    Serial.println("[3] Certificate matched");
   // } else {
   //    Serial.println("[3] Certificate did not match");
   // }

   String payload = "{\"value1\":" + String(vcc) + '}';

   client.print(String("POST ") + API_URL + " "
      "HTTP/1.1\r\n" +
      "Host: " + API_HOST + "\r\n" +
      "Content-Type: application/json\r\n" +
      "Content-Length: " + payload.length() + "\r\n" +
      "Connection: close\r\n\r\n" +
      payload + "\r\n");

   // Serial.println("[4] Request sent");

   while (client.connected()) {
      String line = client.readStringUntil('\n');
      if (line == "\r") {
         // Serial.println("[5] Headers received");
         break;
      }
   }

   String line = client.readStringUntil('\n');
   // Serial.println("[6] Server replied:" + line);
   if (line.startsWith("Congratulations")) {
      // Serial.println("[7] ESP8266 CI successfull");
   } else {
      // Serial.println("[7] ESP8266 CI failed");
   }

   // Serial.println("[8] Triggered event, going to sleep");
   ESP.deepSleep(0);
}

void loop() {
   // Nothing to do here
}
Unlocking More Potential with ESP8266
Thanks to the ESP8266’s open-source community support, you have access to numerous libraries on GitHub, which can significantly enhance your ESP8266 IoT projects. For example, whether you’re interested in WiFi communication, mesh networks, or MQTT protocols, you’ll find ample resources to support your work.
Furthermore, by exploring these affordable ESP8266 boards and leveraging their compatibility with the Arduino IDE, you can develop a diverse range of IoT solutions without breaking the bank.
Further Reading
Having explored the basics of ESP8266 IoT projects, you might be interested in optimizing your setup further. For instance, my recent work focuses on ESP8266 Low Power Engineering for Optimizing Battery Efficiency. In this project, I delve into techniques and strategies to enhance battery life and reduce power consumption, making your IoT devices even more efficient. Stay tuned to learn how to maximize your ESP8266 projects with advanced power-saving methods and get the most out of your devices.

Leave a Reply