14th Jumada Al-Akhirah, 1432 AH at Queens, NY.
Arduino is an open-source electronics prototyping platform designed to make hardware and software flexible and easy to use for everyone. Think of it as a tiny micro-computer in the palm of your hand. You can write programs in C/C++ and upload them to an Arduino in seconds. Programming for microcontrollers has never been so easy until Arduino came along.
There are dozens of Arduino boards available, ranging in price from $20 to $65, depending on the size and functionality. However, if you are on a tight budget and can do without the fancy appearance, you can create one for less than $8. Simply plug it into your breadboard and make the world’s cheapest palmtop computer!
Allah does not burden a soul beyond that it can bear…
Quran 2:286
Components
You will need one of the following ATmega microcontrollers: ATmega8, ATmega168, or ATmega328. These microcontrollers share the same pinouts, with the main difference being their memory capacities. I suggest using the ATmega328 because it is the newest of the three and offers the most memory—2K SRAM and 1K EEPROM.
- ATmega MCU
- 16 MHz Ceramic Resonator
- 78L05 Voltage Regulator
- Resistors: 390Ω
- Capacitors: 0.47μF, 0.01μF
- LED

Schematics

This simple design includes three external components:
Power Supply
The 78L05 provides a clean, regulated 5V power supply, which is required for powering the microcontroller.
External Clock
The ceramic resonator generates a 16 MHz clock pulse, which is essential for the microcontroller’s operation.
I/O Port
Pin 19 is used as an output port to lit an LED. Arduino refers this pin as digital I/O pin 13.
Burning the Bootloader
You can buy the ATmega microcontroller with a preloaded bootloader. Sparkfun sells them for an additional cost (around $1.20) compared to the regular price. If you don’t have the preloaded chip, you’ll need an additional device—the AVRISP mkII—to burn the bootloader. A quick search on Google will show you where to find it. It’s relatively expensive ($34) if you plan to use it for just one project, but it can program over a hundred different ATMEL MCUs.

Pins 14 through 19 are digital I/O ports, denoted as PB0 to PB5. Similarly, pins 2 through 6 and pins 11 through 13 are digital I/O ports, denoted as PD0 to PD7. Pins 23 through 28 are six ADC (Analog to Digital Converter) ports, denoted as PC0 to PC5.

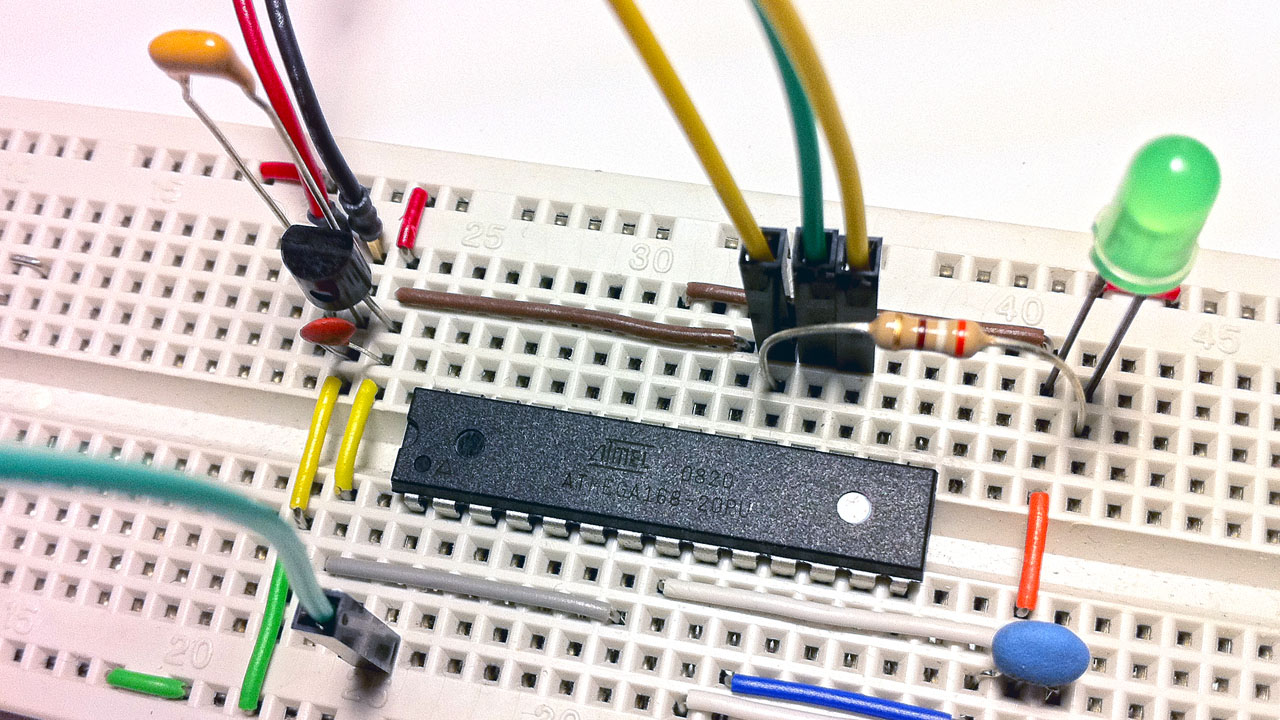
Wire up the AVRISP mkII with the ATmega chip using these six pins: VCC, GND, MOSI (pin 17), MISO (pin 18), SCK (pin 19), and RESET (pin 1). In the picture above, you will see these six wires going into the board.

Next, open the Arduino IDE and choose the correct board (ATmega328 or ATmega168, 5V, 16MHz) from the Tools menu. Make sure to connect the AVRISP mkII and power up the Arduino board. If the connection is correct, the LED on the mkII will light up green. Go to Tools > Burn Bootloader.
Note: You don’t need to install AVRStudio.

Blink Demo
The bootloader comes with the Blink sketch by default. After successfully burning the bootloader, the LED (Arduino digital pin 13) will start blinking. To find the corresponding Arduino pin associated with the ATmega chip, see the Pin Mapping page on the official Arduino website.
