Starting fresh can be transformative, especially when it comes to setting up a brand-new Mac. In 2025, I’ve embarked on a journey to create the ultimate development environment that’s modern, efficient, and aligned with my goal of achieving a zenful experience as a software developer. This setup isn’t just about tools; it’s about crafting a seamless workflow that eliminates distractions and sparks creativity.
Having previously used a 2016 MacBook Pro with Bash running alongside Bash-it and iTerm2, my home directory became a chaotic mess of scattered dotfiles and untracked configurations. This time, I’m determined to approach things differently, embracing best practices like version control for my configurations and modern tools that streamline productivity. Let’s dive into how I’m setting up my new Mac Mini to achieve this vision.
Setting Up XDG for a Clean and Organized macOS Environment
XDG (X Desktop Group) is a set of standards that defines where applications should store their configuration files, data, cache, and runtime data in a user’s home directory. By following the XDG Base Directory Specification, you can keep your environment organized, reduce clutter, and ensure portability across different systems, making it easier to manage software and custom configurations.
First, ensure the necessary directories are created if they don’t exist:
mkdir -p ~/{.config,.cache,.local/share,.local/state}To make sure the XDG directories are used for your environment, add the following to your ~/.zshenv file:
# Set XDG environment variables
export XDG_CONFIG_HOME="$HOME/.config"
export XDG_CACHE_HOME="$HOME/.cache"
export XDG_DATA_HOME="$HOME/.local/share"
export XDG_STATE_HOME="$HOME/.local/state"
export XDG_RUNTIME_DIR="$TMPDIR/xdg_runtime"

# Colorize ls output
export CLICOLOR=1
export LSCOLORS=ExFxBxDxCxegedabagacad
Save the file, and apply changes by opening up a new terminal window.
Generating and Adding SSH Keys for GitHub
To securely interact with GitHub, you’ll need to generate SSH keys, configure them for macOS, and add them to your GitHub account.
First, generate a new SSH key by running:
ssh-keygen -t ed25519 -C "[email protected]"Replace [email protected] with your email address. When prompted, specify a location for the key or press Enter to use the default (~/.ssh/id_ed25519). Set a secure passphrase for added security.
Next, adding a ~/.ssh/config file simplifies SSH key management for GitHub by automating key loading, integrating with the macOS keychain to store passphrases, and ensuring the correct key is used for authentication.
If the file doesn’t exist, create it:
nano ~/.ssh/configAdd the following configuration:
Host github.com gitlab.com
  AddKeysToAgent yes
  UseKeychain yes
  IdentityFile ~/.ssh/id_ed25519
Start the SSH agent in the background.:
eval "$(ssh-agent -s)"Copy your SSH public key to the clipboard:
pbcopy < ~/.ssh/id_ed25519.pubLog in to your GitHub and/or GitLab account and go to Settings/Preferences. Add the New SSH key by simply pasting the key.
Finally, test the connection to verify your setup:
ssh -T [email protected]A success message like this confirms everything is working:
Hi username! You've successfully authenticated, but GitHub does not provide shell access.Repeat the same steps for GitLab (if you have an account):
ssh -T [email protected]If everything is working, you should see a success message like this:
Welcome to GitLab, @username!Installing Git
If you’re setting up a new Mac, the first step is to install the latest version of Git. The version included with macOS is often outdated, so use Homebrew, a trusted package manager, to get the most up-to-date release.
Install Homebrew (if not already installed):
/bin/bash -c "$(curl -fsSL https://raw.githubusercontent.com/Homebrew/install/HEAD/install.sh)"Next, I add Homebrew to PATH:
echo 'eval "$(/opt/homebrew/bin/brew shellenv)"' >> ~/.zprofile
eval "$(/opt/homebrew/bin/brew shellenv)"
Install Git:
brew install gitThis ensures you have the latest version of Git ready to go. Open up a new terminal window and verify it by running:
git -vMake sure Git writes config to $XDG_CONFIG_HOME/git/config instead of ~/.gitconfig.
mkdir -p $XDG_CONFIG_HOME/git
touch $XDG_CONFIG_HOME/git/config
nano $XDG_CONFIG_HOME/git/ignore
Add global gitignore rules in $XDG_CONFIG_HOME/git/ignore.
# macOS
.DS_Store
.AppleDouble
.LSOverride
Icon

._*
.DocumentRevisions-V100
.fseventsd
.Spotlight-V100
.TemporaryItems
.Trashes
.VolumeIcon.icns
.com.apple.timemachine.donotpresent

# Linux
*~
.fuse_hidden*
.directory
.Trash-*
.nfs*

# Windows
Thumbs.db
Thumbs.db:encryptable
ehthumbs.db
ehthumbs_vista.db
[Dd]esktop.ini
$RECYCLE.BIN/
*.lnk
Save the file and configure Git:
git config --global user.name "Neo"
git config --global user.email "[email protected]"
git config --global init.defaultBranch main
git config --global core.autocrlf input
git config --global core.excludesfile $XDG_CONFIG_HOME/git/ignore
Setting Up Git in the Home Directory
To keep track of changes during the setup process, initialize a Git repository in your home directory. This allows you to version control your configurations while ignoring unnecessary or sensitive files.
Navigate to the home directory:
cd ~Initialize a Git repository:
git initCreate a .gitignore file to exclude unwanted files and folders like Documents, Downloads, Desktop, and sensitive files such as SSH and GPG keys:
# Ignore common Mac directories
/Desktop/
/Documents/
/Downloads/
/Library/
/Movies/
/Music/
/Pictures/
/Public/

# Ignore user specific directories
/Projects/
/Business/

# Ignore encryption keys
/.ssh/
/.gnupg/

# Ignore unwanted XDG directories
/.cache/
/.local/share/
/.local/state/
/.config/nvm/

# Ignore more unwanted files and directories
/.cursor/
/.zsh_sessions/
/.zsh_history
/.zcompcache/
/.zcompdump
/.lesshst
/.viminfo
/.gitflow_export
/.hgignore_global

# Ignore hidden macOS files and directories
.Trash/
.cups/
.CFUserTextEncoding
Stage and commit the initial setup:
git add -A
git commit -m "Initial commit of a fresh home directory"
By version-controlling your home directory, you’ll maintain a clean and organized setup, making it easier to track changes and roll back if needed.
If you want to push this as a private repo on GitHub, run:
git remote add origin [email protected]:neo/my-home-dir.git
git push -u origin main
Replace neo/my-home-dir with your GitHub username and repository name.
Keeping Git Commands Rooted for a Smoother Workflow
Running git commands only from the repository root keeps things tidy and prevents accidental mix-ups with relative paths. It helps you avoid potential errors when working in nested directories and ensures that every command operates on the entire project as expected. In short, it’s all about keeping your workflow clean and predictable, which is a win for any developer.
One common solution is to override (wrap) the git command in your shell so that it checks whether you’re in the repository’s root directory before running any command. Create a new file and add a function like the one
Create a new file ~/.zgitguard
# List of commands that don't require being in a repo root.
allowed_commands=("init" "clone" "config" "help" "version")

git() {
  # Check if the first argument is one of the allowed commands.
  for cmd in "${allowed_commands[@]}"; do
    if [[ "$1" == "$cmd" ]]; then
      command git "$@"
      return
    fi
  done

  # For other commands, try to determine the repository root.
  local git_root
  if ! git_root=$(command git rev-parse --show-toplevel 2>/dev/null); then
    echo "Not a git repository." >&2
    return 1
  fi

  # Check if we're in the repository root.
  if [[ "$PWD" != "$git_root" ]]; then
    echo "Please run git commands from the repository root: $git_root" >&2
    return 1
  fi

  # Execute the git command normally.
  command git "$@"
}
Open your ~/.zshrc
# Prevent accidental git commands outside intended repo
[[ -f ~/.zgitguard ]] && source ~/.zgitguard
Installing Ghostty for a Zenful Terminal Experience
To elevate your terminal experience, Ghostty is a perfect choice. It’s sleek, minimal, and fast, creating a zenful environment for your development workflow.
Start by installing Ghostty with Homebrew. Since it’s a GUI application, you’ll need to use the --cask flag:
brew install --cask ghosttyNext, we need to install a Nerd Font for our new terminal app. I like to use FiraCode Nerd Font Mono. Download and install it on your macOS.
Create a config file for Ghostty:
mkdir -p $XDG_CONFIG_HOME/ghostty
nano $XDG_CONFIG_HOME/ghostty/config
Add the followings:
font-family = FiraCode Nerd Font Mono
font-size = 16
adjust-cell-width = -3%
theme = coolnight
mouse-hide-while-typing = true
background-opacity = 1
background-blur-radius = 0
unfocused-split-opacity = 1
window-padding-x = 8
window-padding-y = 8
copy-on-select = clipboard
shell-integration-features = no-cursor,no-sudo,title
macos-titlebar-proxy-icon = hidden
Now, close Mac’s default terminal and open the Ghostty app.
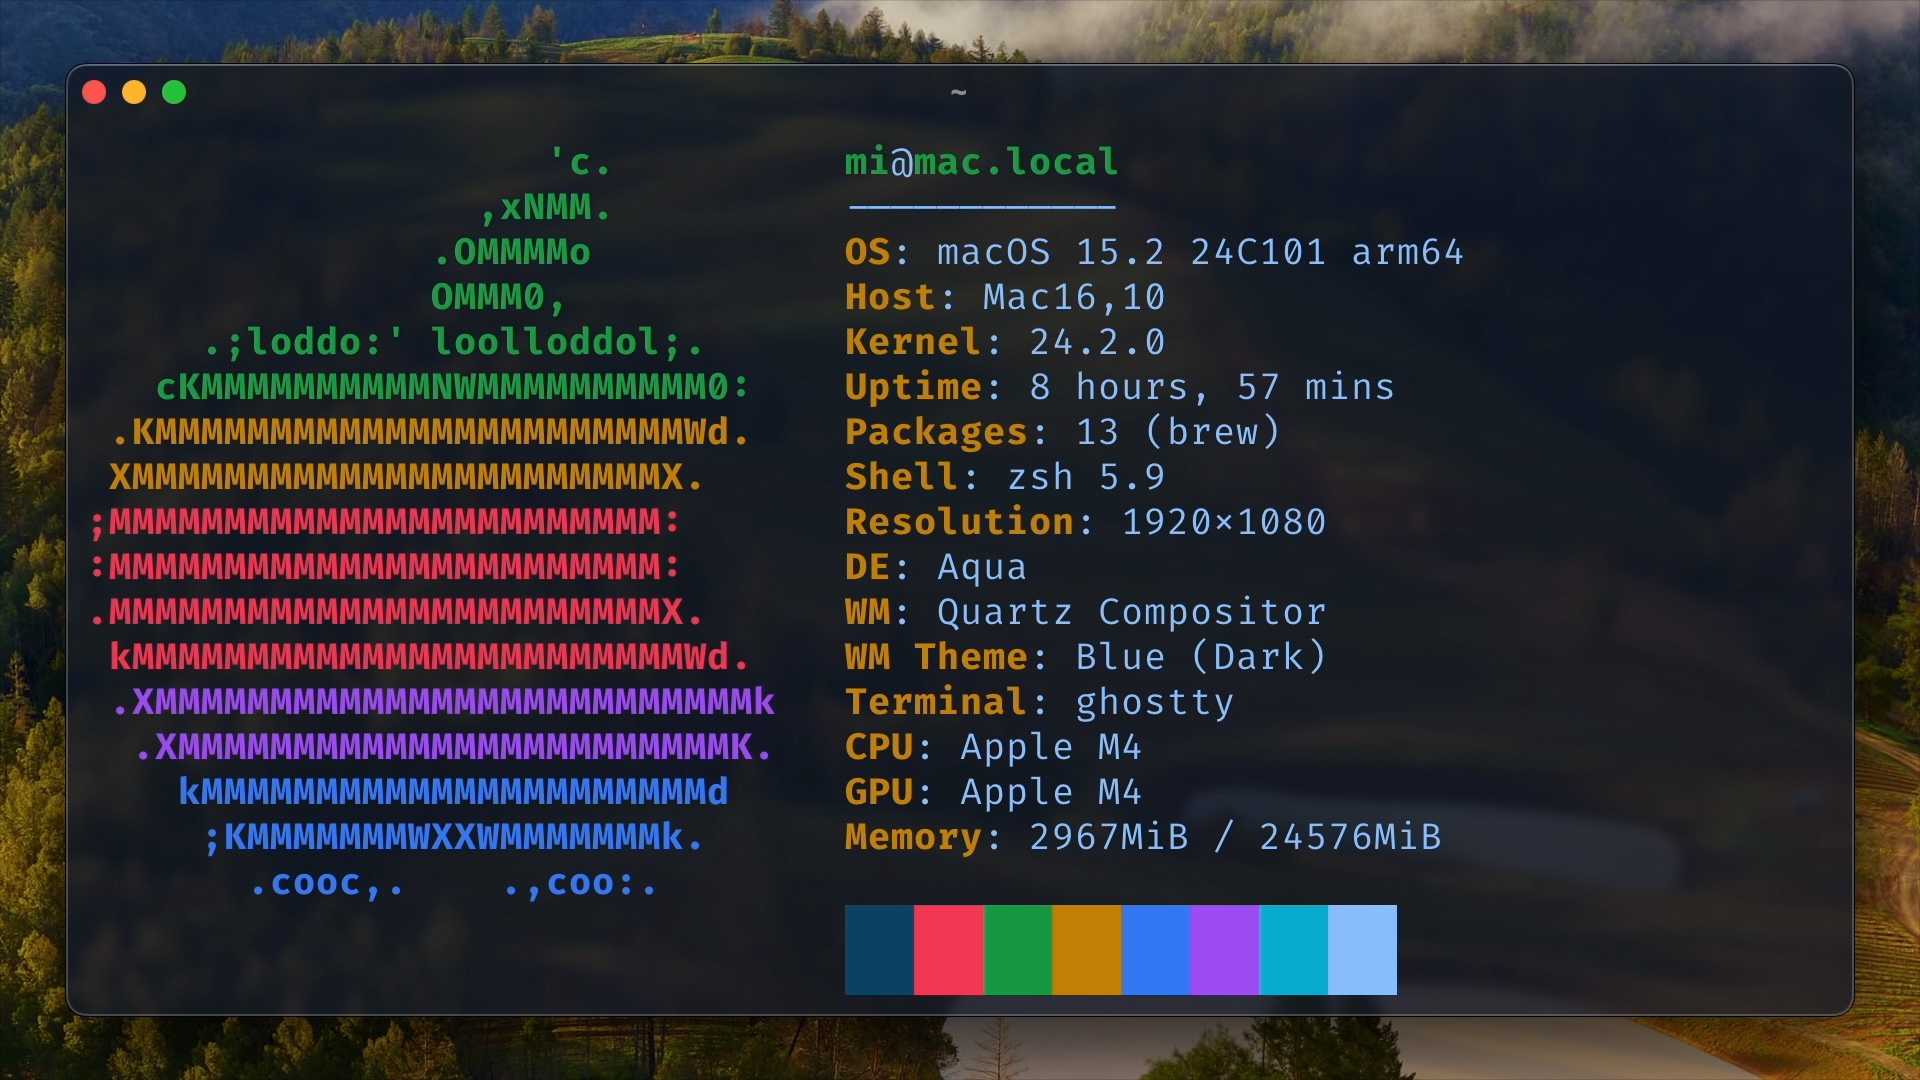
Installing Neofetch (Optional)
Neofetch is the tool displaying your system information in an aesthetic format.
Install neofetch via homebrew:
brew install neofetchOnce installed, run:
neofetchInstalling Zinit – a fast Zshell Plugin Manager
Zinit is a flexible and fast Zshell plugin manager that will allow you to install everything from GitHub and other sites.
In your .zshrc, add the following snippet:
# Set the directory to store zinit and plugins
# Download zinit if it doesn't exist and source zinit
ZINIT_HOME="${XDG_DATA_HOME:-${HOME}/.local/share}/zinit/zinit.git"
[ ! -d $ZINIT_HOME ] && mkdir -p "$(dirname $ZINIT_HOME)"
[ ! -d $ZINIT_HOME/.git ] && git clone https://github.com/zdharma-continuum/zinit.git "$ZINIT_HOME"
source "${ZINIT_HOME}/zinit.zsh"
Now, open up a new terminal window and verify if it’s working correctly:
zinit zstatusIt should display brief statistics for your Zinit installation.
Installing Powerlevel10k Theme for Zsh
Powerlevel10k is a theme for Zsh. It emphasizes speed, flexibility and out-of-the-box experience.
Add the following lines in your ~/.zshrc file:
# Enable Powerlevel10k instant prompt. Should stay close to the top of ~/.zshrc.
# Initialization code that may require console input (password prompts, [y/n]
# confirmations, etc.) must go above this block; everything else may go below.
if [[ -r "${XDG_CACHE_HOME:-$HOME/.cache}/p10k-instant-prompt-${(%):-%n}.zsh" ]]; then
  source "${XDG_CACHE_HOME:-$HOME/.cache}/p10k-instant-prompt-${(%):-%n}.zsh"
fi

# Set the directory to store zinit and plugins
...

# Install Powerlevel10k
zinit ice depth=1; zinit light romkatv/powerlevel10k

# Load Powerlevel10k configuration
# To customize prompt, run `p10k configure` or edit ~/.p10k.zsh.
[[ ! -f ~/.p10k.zsh ]] || source ~/.p10k.zsh
Now, open up a new terminal and start configuring Powerlevel10k.
Enhancing Your Zsh Experience with Essential Plugins
First install fzf with homebrew. It’s a general-purpose command-line fuzzy finder.
To install fzf, run:
brew install fzfMake your Zsh setup even more powerful with these essential plugins. From syntax highlighting to smart autocompletion, here’s how you can easily integrate zsh-syntax-highlighting, zsh-completions, and zsh-autosuggestions using Zinit.
Add the following lines to your ~/.zshrc file:
# Install zsh-syntax-highlighting, zsh-autosuggestions, and zsh-completions
zinit light zsh-users/zsh-syntax-highlighting
zinit light zsh-users/zsh-autosuggestions
zinit light zsh-users/zsh-completions

# Load completions
autoload -Uz compinit && compinit

# Replay compdef calls from plugins
zinit cdreplay -q
Save the file and open up a new terminal window.
Configuring Zsh History and Key Binding
Let’s change the path for Zsh history file:
mkdir -p $XDG_DATA_HOME/zsh
mv ~/.zsh_history $XDG_DATA_HOME/zsh/history
Add the following lines to your ~/.zshrc file:
# Set up Zsh key bindings
bindkey -e

# Use up/down for history search for a given input
bindkey '^[[A' history-search-backward
bindkey '^[[B' history-search-forward

# Set up Zsh history
export HISTFILE="${XDG_DATA_HOME:-$HOME/.local/share}/zsh/history"
export HISTSIZE=10000
export SAVEHIST=10000
export HISTDUP=erase
setopt APPEND_HISTORY
setopt SHARE_HISTORY
setopt HIST_IGNORE_SPACE
setopt HIST_IGNORE_ALL_DUPS
setopt HIST_SAVE_NO_DUPS
setopt HIST_IGNORE_DUPS
setopt HIST_FIND_NO_DUPS

# Configure completion styles
zstyle ':completion:*' matcher-list 'm:{a-zA-Z}={A-Za-z}'
zstyle ':completion:*' list-colors "${(s.:.)LS_COLORS}"
zstyle ':completion:*' menu no
zstyle ':fzf-tab:complete:cd:*' fzf-preview 'ls --color $realpath'

# Shell integration for fzf
source <(fzf --zsh)
Enhancing Terminal with eza and zoxide
To supercharge your command-line experience, you can install eza and zoxide, which enhance the basic ls and cd commands:
- eza is a modern, feature-rich replacement for
ls. It provides colored output, improved sorting, better directory tree visualization, and more. - zoxide is a smarter way to navigate directories. It learns your frequently used paths and lets you quickly jump between them with
zinstead of typing full directory paths.
To install both tools, run:
brew install eza zoxideAfter installation, enhance your shell by adding these aliases to your ~/.zshrc file:
# Aliases for eza and zoxide
alias ls='eza --icons=always --group-directories-first'

# Shell integration for zoxide with cd alias to use z command
eval "$(zoxide init --cmd cd zsh)"
Adding Useful Aliases
Let’s make our life a bit easier by adding shortcuts to the frequently used commands. Create a new file ~/.zaliases
# File navigation
alias ls='eza --icons=always --group-directories-first'
alias ll='ls -la'
alias ..='cd ..'
alias ...='cd ../..'
alias ....='cd ../../..'

# Git shortcuts
alias gcl='git clone'
alias ga='git add'
alias gaa='git add --all'
alias gst='git status'
alias gb='git branch'
alias gco='git checkout'
alias gc='git commit'
alias gcm='git commit -m'
alias gca='git commit --amend'
alias gcan='git commit --amend --no-edit'
alias gpl='git pull'
alias gps='git push'
alias gd='git diff'
alias glo='git log --oneline --graph'
alias gls='git log --stat --graph'
Open your ~/.zshrc
# Load aliases
[[ -f ~/.zaliases ]] && source ~/.zaliases
Installing NVM and PNPM for Node.js Development
NVM (Node Version Manager) simplifies managing multiple Node.js versions. It ensures you can switch between versions as needed, keeping projects compatible and avoiding conflicts.
Install NVM via cURL:
curl -o- https://raw.githubusercontent.com/nvm-sh/nvm/v0.40.1/install.sh | bashClose and reopen your terminal to start using nvm.
Install the latest LTS version of Node.js with:
nvm install --ltsVerify your Node.js and NPM installation by running:
node -v
npm -v
Now that you have Node and NPM installed, we still need a better package manager. PNPM is faster and more efficient than NPM or Yarn, saving disk space with its unique file linking system and ensuring reliable, consistent dependency management.
To install pnpm, run:
brew install pnpmVerify your installation by running:
pnpm -vInstalling rbenv and CocoaPods for Capacitor iOS Development
rbenv manages Ruby versions, avoiding conflicts with the system Ruby for Capacitor’s iOS dependency management. CocoaPods is required to handle native iOS dependencies in Capacitor projects.
Install rbenv via Homebrew:
brew install tmuxAdd the following to your ~/.zshenv file:
export RBENV_ROOT="$XDG_DATA_HOME/rbenv"Initialize rbenv in your shell by adding to ~/.zshrc:
eval "$(rbenv init - zsh)"Install Ruby 3.2.2 and set it globally:
rbenv install 3.2.2
rbenv global 3.2.2
Configure RubyGems for XDG compliance in ~/.zshenv:
export GEM_HOME="$XDG_DATA_HOME/gem"
export GEM_SPEC_CACHE="$XDG_CACHE_HOME/gem"
export PATH="$GEM_HOME/bin:$PATH"
Install CocoaPods:
gem install cocoapodsInstalling Tmux and TPM
I used to open multiple side-by-side terminal windows for development. It worked, but things got messy fast. tmux keeps everything organized in a single window, allowing you to split panes efficiently, switch contexts instantly, and even restore sessions after a reboot — without the clutter.
To install tmux, run:
brew install tmuxVerify the installation:
tmux -VNow, install TPM into $XDG_DATA_HOME/tmux/plugins/tpm:
mkdir -p $XDG_DATA_HOME/tmux/plugins
git clone https://github.com/tmux-plugins/tpm $XDG_DATA_HOME/tmux/plugins/tpm
Create the config file for tmux:
mkdir -p $XDG_CONFIG_HOME/tmux
nano $XDG_CONFIG_HOME/tmux/tmux.conf
Add the followings:
# Enable mouse support for pane/window management
set -g mouse on

set-environment -g TMUX_PLUGIN_MANAGER_PATH '~/.local/share/tmux/plugins'

# Theme configuration (catppuccin)
set -g @catppuccin_flavor "mocha"  # Color variant: latte/frappe/macchiato/mocha
set -g @catppuccin_window_status_style "rounded"  # Window status display style

# Essential plugins
set -g @plugin "tmux-plugins/tpm"  # Tmux Plugin Manager
set -g @plugin "tmux-plugins/tmux-sensible"  # Defaults everyone can agree on
set -g @plugin "catppuccin/tmux#v2.1.2"  # Color theme package

# Initialize Tmux Plugin Manager (must remain at bottom)
run "~/.local/share/tmux/plugins/tpm/tpm"

set -g @plugin_manager_path "~/.local/share/tmux/plugins"

# Status bar customization
set -g status-style bg=default  # Transparent status bar background
set -g status-left ""  # Clear left status section
set -g status-left-length 100
set -g status-right-length 100
set -g status-right "#{E:@catppuccin_status_application}"  # Application status
set -ag status-right "#{E:@catppuccin_status_session}"  # Session info
set -ag status-right "#{E:@catppuccin_status_uptime}"  # System uptime
Open up a new terminal window and run tmux:
tmuxPress Ctrl+B, then capital I to install the plugins.
Cursor – The AI-Powered Code Editor
Switching from VSCode to Cursor AI Code Editor felt like a leap into the future of coding. While VSCode is powerful and highly customizable, Cursor introduced a seamless AI-driven experience that changed the way I write and debug code. Its AI assistant isn’t just a fancy autocomplete — it actively understands your codebase, suggesting optimizations, refactoring, and even generating boilerplate with surprising precision.
Once Cursor is installed, you can make it use your personalized settings. To do so, first create a settings.json file in $XDG_CONFIG_HOME/cursor.
mkdir -p $XDG_CONFIG_HOME/cursor
nano $XDG_CONFIG_HOME/cursor/settings.json
Add the followings in :
{
  "editor.fontFamily": "'Fira Code', 'JetBrains Mono', Menlo, Monaco, 'Courier New', monospace",
  "editor.fontLigatures": true,
  "editor.fontSize": 12,
  "editor.letterSpacing": -0.37,
  "editor.tabSize": 2,
  "window.zoomLevel": 1.67,
  "workbench.colorTheme": "Anysphere",
  "workbench.iconTheme": "material-icon-theme",
  "terminal.integrated.fontFamily": "FiraCode Nerd Font Mono",
  "terminal.integrated.fontSize": 12,
  "git.openRepositoryInParentFolders": "never",
  "editor.cursorStyle": "block",
  "workbench.colorCustomizations": {
    "editorCursor.foreground": "#16a34a"
  }
}
Save it and create a symlink from original location:
ln -sf $XDG_CONFIG_HOME/cursor/settings.json ~/Library/Application\ Support/Cursor/User/settings.jsonThat’s it!
What truly stood out for me was the natural flow it enabled. Cursor’s inline AI insights reduced the need to switch between browser tabs or dig through documentation. Complex tasks like integrating libraries or deciphering errors became quicker and less frustrating. It feels like having a second brain for coding — one that speeds up workflows while helping you write cleaner, more efficient code.
Installing Docker Desktop and SourceTree
Docker Desktop allows you to run containerized applications, ensuring a consistent environment across different stages of development. It’s essential for managing and deploying applications in isolated containers, making development and testing more efficient.
SourceTree is a Git GUI tool that simplifies viewing changes, history, and managing repositories. It’s great for those who prefer a graphical interface over the command line for version control tasks.
To install both:
- Install Docker Desktop:
Visit the Docker Desktop download page and download the installer for macOS. - Install SourceTree:
Visit the SourceTree download page and download the installer for macOS.
These tools will help streamline your workflow by providing a powerful containerization platform and an intuitive Git interface.
A Continuous Journey
This is just the beginning of my Mac mini setup, and the journey is far from over. As I continue to refine and optimize my environment, I’ll keep adding new tools, tweaks, and configurations to create the ultimate zenful developer experience. This blog post will serve as a living diary, with updates along the way as I discover better ways to work, create, and grow. Stay tuned for more as I evolve this setup into something truly personal and powerful.
Dig Further
I also recommend watching this video, where CJ Reynolds explained how to set up a Mac in 2024 for Power Users and Developers.
